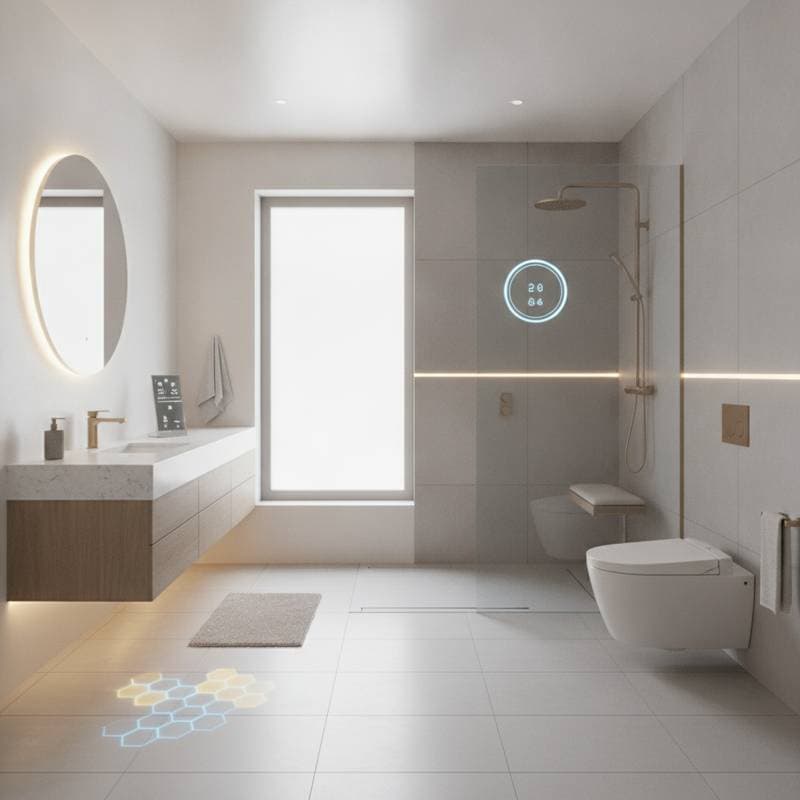
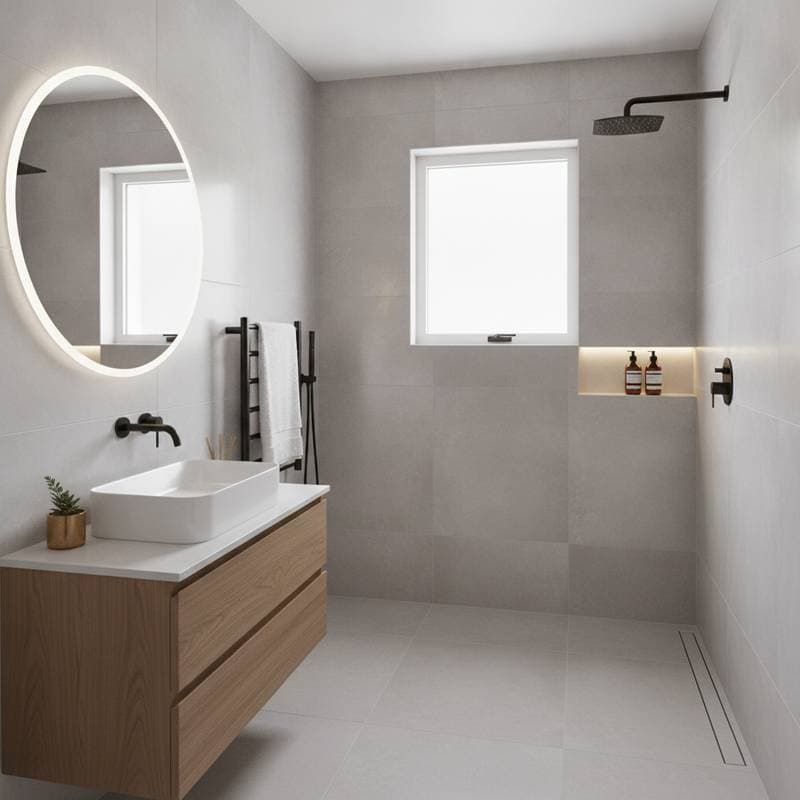
What Is a Wet Room?
A wet room represents a fully integrated bathroom space where the shower area merges seamlessly with the rest of the room. Unlike traditional setups with enclosed showers or tubs, wet rooms feature a level floor and waterproofed surfaces that allow water to flow freely toward integrated drains. This design originated in Europe and gains popularity in the United States for its minimalist aesthetic and practical advantages.
Key characteristics define a well-constructed wet room:
- Fully waterproofed surfaces: Walls and floors receive a comprehensive membrane or lining to prevent water penetration.
- Level flooring: The entire space maintains a uniform height, eliminating steps or curbs for smooth transitions.
- Open layout: Minimal or no partitions create a spacious, airy feel.
- Drainage integration: Linear or point drains, often in stainless steel, install flush with the floor for efficient water removal.
- Ventilation: A powerful exhaust fan controls humidity and prevents condensation buildup.
When constructed properly, a wet room withstands years of daily use without leaks or mold problems.
Planning Your Wet Room Layout
Effective planning forms the foundation of a successful wet room installation. Consider the space constraints, user needs, and technical requirements before any demolition begins. Accurate measurements and material selection ensure the project meets both functional and aesthetic goals.
Step 1: Choose the Location
Evaluate the existing bathroom layout to determine feasibility. Wet rooms suit both compact and expansive areas, though smaller spaces demand careful attention to water containment. Direct the showerhead away from entry doors or windows to reduce splatter on adjacent surfaces.
Step 2: Waterproof Everything
Waterproofing stands as the cornerstone of wet room durability. Apply a liquid-applied membrane or install waterproof backing boards over walls, floors, and seams. Engage a professional for this phase, as improper application invites water damage and structural issues over time.
Step 3: Select the Right Drainage
Opt for linear drains along one wall to facilitate even water flow and simplify tile alignment. Central point drains suit symmetrical designs but necessitate a consistent floor slope of about one-quarter inch per foot. Verify drain capacity matches the room's water volume to avoid pooling.
Step 4: Pick Durable Materials
Porcelain tiles offer density, slip resistance, and versatility in finishes for wet room floors and walls. Large-format tiles reduce grout lines and ease cleaning. Steer clear of unsealed natural stone, which demands frequent maintenance to resist staining and wear.
Step 5: Add Smart Details
Incorporate elements like a built-in bench for seating or recessed shelves for storage to enhance usability. A low glass panel can direct water flow without compromising the open design. Balance these additions to preserve the room's fluid, unobstructed character.
Cost, Timeline, and Difficulty
Wet room projects exceed standard bathroom renovations in complexity due to specialized waterproofing and drainage. Labor-intensive elements drive up expenses, yet the long-term value often justifies the outlay through increased home appeal and reduced upkeep.
Typical cost ranges:
- DIY or partial remodel: $5,000 to $8,000, assuming prior tiling expertise and minimal demolition.
- Mid-range professional installation: $10,000 to $18,000 for full conversion with premium finishes.
- Premium spa-style wet room: $25,000 or higher, incorporating luxury features like heated floors and custom elements.
Timeline: Projects span two to four weeks, influenced by room dimensions and material lead times.
Difficulty level: Moderate to high. Precise waterproofing and drainage installation favor experienced contractors licensed in wet room builds.
Safety and Compliance Considerations
Safety protocols and code adherence prevent hazards in wet environments. Prioritize materials and installations that mitigate risks while satisfying regulatory standards.
- Slip resistance: Select tiles with a high dynamic coefficient of friction for wet surfaces to minimize fall risks.
- Proper slope: Direct water toward drains with a gentle gradient of one-quarter inch per foot.
- Ventilation: Equip the space with a fan rated for high humidity to safeguard against moisture damage.
- Electrical safety: Position outlets, lights, and controls in GFCI-protected, dry zones per local codes.
- Permits: Obtain necessary approvals for plumbing and structural modifications from municipal authorities.
Consult a certified plumber or tiler if uncertainties arise. Early detection of flaws averts costly corrections.
Design Trends Shaping Wet Rooms
Contemporary wet rooms blend utility with sophisticated style. Innovators draw from global influences to craft environments that feel both serene and modern.
Popular design directions include:
- Natural finishes: Stone-effect or wood-inspired porcelain tiles introduce organic texture and warmth.
- Matte black fixtures: Hardware in subdued tones provides striking accents against neutral palettes.
- Integrated lighting: Recessed LEDs illuminate niches or edges for ambient, energy-efficient illumination.
- Walk-in simplicity: Seamless entry without barriers emphasizes fluidity and ease of access.
- Color zoning: Subtle tile variations delineate functional zones while preserving visual unity.
These choices allow customization that aligns with personal taste and elevates the overall bathroom experience.
Long-Term Benefits and Maintenance
Wet rooms deliver enduring advantages in accessibility, cleanliness, and property enhancement. Seamless construction simplifies daily routines and resists common wear.
For optimal longevity:
- Wipe surfaces after use to eliminate residue buildup.
- Clear drains of hair and debris monthly.
- Reapply grout sealant every two to three years.
- Verify fan operation quarterly to ensure ventilation efficiency.
Routine care preserves the waterproof integrity and aesthetic appeal for decades.
Steps to Install Your Wet Room
Transform your bathroom into a wet room through deliberate preparation and execution. Begin with a detailed sketch incorporating dimensions and fixtures. Solicit bids from specialists in waterproof installations, reviewing portfolios for relevant expertise and code knowledge.
Select materials that align with your vision and budget. Oversee progress to confirm waterproofing and drainage meet specifications. The result yields a versatile space that enhances daily comfort and home value.