Convert Gas to Induction: Quick Kitchen Makeover
Home cooks often appreciate the familiar flame of a gas range, yet induction cooktops offer compelling advantages in efficiency and safety. If scrubbing burner grates has become a chore or concerns about indoor air quality arise, consider this upgrade. The transition from gas to induction modernizes the kitchen swiftly, typically within a single weekend, while delivering precise heat control, rapid boiling, and simplified maintenance.
This change extends beyond aesthetics to include practical enhancements in energy consumption and hazard reduction. Most setups require minimal disruption, avoiding a complete renovation. The following sections detail the planning, expenses, and execution to achieve a seamless conversion.
Understanding the Conversion Process
The switch from gas to induction appears straightforward at first: remove the old range, secure the gas supply, and connect the new appliance. Electrical demands, however, introduce the primary complexity. Gas ranges rely on a basic 120-volt outlet for controls, whereas induction models require robust power, often a dedicated 240-volt line to handle high amperage without overload.
Professional assessment ensures compliance and safety. Key steps in the process include:
- Assess the electrical panel. Determine available space for a double-pole breaker rated at 40 or 50 amps, depending on the unit's specifications.
- Verify wiring adequacy. Select wire gauge appropriate for the cooktop's power draw; for example, a standard 30-inch induction cooktop typically demands a 40-amp circuit with 8-gauge wire.
- Secure the gas line. Engage a licensed plumber to isolate and cap the line, performing a pressure test to confirm no leaks and adherence to local codes.
- Mount the new appliance. With the circuit prepared, secure the cooktop via hardwiring or a compatible receptacle, ensuring proper alignment in the cabinetry.
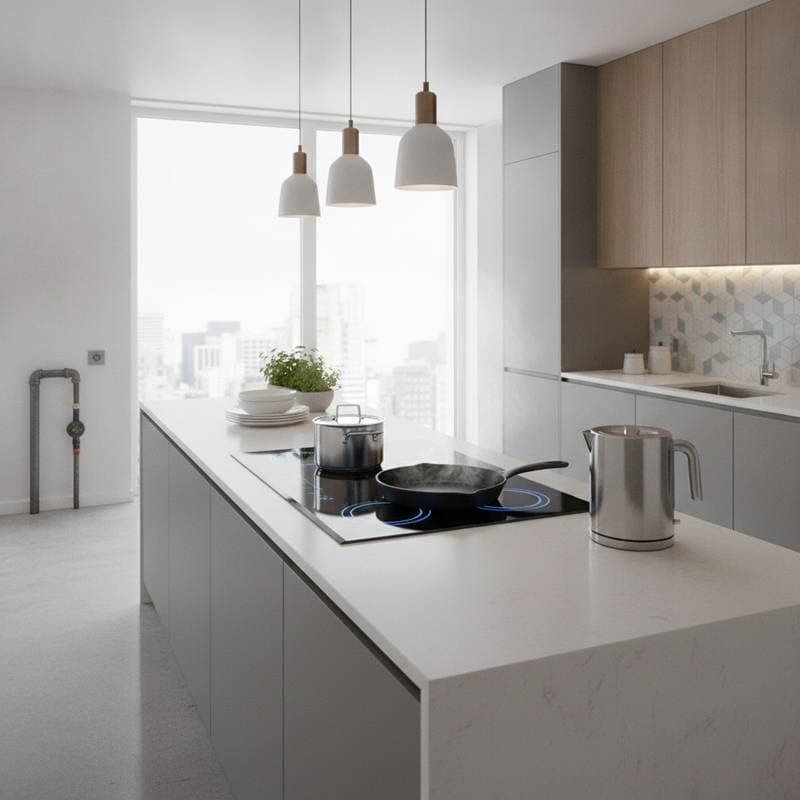
- Validate functionality and airflow. Activate each heating zone with ferromagnetic cookware to check even heating, and measure the range hood's capture rate to handle vapors effectively, aiming for at least 100 cubic feet per minute.
Experienced technicians complete these tasks in four to six hours when electrical modifications prove uncomplicated, minimizing downtime.
What the Conversion Costs
Expenses vary based on existing infrastructure and selected features. Budget for the appliance itself, infrastructure adjustments, and professional services to avoid surprises.
Detailed cost breakdown:
- Induction cooktop or range:
- Basic 30-inch models with four zones: $900 to $1,300
- Advanced 36-inch options with bridge zones for larger pans: $1,500 to $2,500
- High-end units integrating Wi-Fi controls and precise temperature sensors: $3,000 and above
- Electrical modifications:
- Installation of a new 240-volt circuit, including conduit and breaker: $300 to $700
- Full panel expansion or subpanel addition for insufficient capacity: $1,000 to $2,500
- Gas line capping: $100 to $200, covering tools, materials, and certification
- Appliance installation labor: $150 to $400, encompassing alignment, testing, and cleanup
Homeowners with pre-existing 240-volt service often complete the project for $1,200 to $2,000 total. Comprehensive upgrades, including panel work, may total $3,000 to $4,000. These investments yield long-term savings through reduced utility bills and enhanced property appeal, often recouping costs via improved efficiency and market value.
How to Plan a Quick Weekend Conversion
When electrical readiness exists, coordinate tasks to fit a two-day schedule. Advance preparation prevents delays and ensures professional involvement where required.
Step 1: Measure and Prepare
Record the dimensions of the current range cutout, including width, depth, and height clearances. Consult the induction model's manual for exact tolerances, such as minimum 1.5-inch overhangs for ventilation. Protect adjacent surfaces with durable coverings to safeguard against scratches during removal.
Step 2: Schedule a Professional Disconnect
Arrange for a certified gas professional to arrive early on day one. They isolate the supply valve, purge residual gas, and install a threaded cap with sealant, followed by a soap-solution leak detection test. This service complies with standards like those from the International Fuel Gas Code.
Step 3: Electrical Setup
Prior to appliance delivery, have an electrician inspect the existing 240-volt line for compatibility, confirming breaker amperage aligns with the unit's nameplate rating. For new installations, they route cable through walls or floors, install a junction box, and label the panel clearly. Complete this phase the day before to allow settling time.
Step 4: Install the New Unit
Position the cooktop into the prepared opening, securing it with provided clips or screws to prevent movement. The electrician connects flexible cord or direct wires, grounding to the chassis for safety. Double-check levelness with a bubble tool and seal edges with heat-resistant silicone if specified.
Step 5: Test and Learn
Power on the unit and calibrate each zone using a magnetic pan tester to verify induction activation. Simulate cooking scenarios, like simmering sauces, to adapt to the instantaneous response, which heats cookware directly rather than the surface. Review the user manual for features like boost mode, which achieves boiling in under two minutes for a quart of water.
Advancing Your Kitchen's Performance
The shift to induction elevates daily cooking through superior energy transfer, eliminating open flames for reduced burn risks and no combustion byproducts. Homeowners report up to 10 percent lower electricity use compared to gas, alongside effortless wiping of the smooth glass surface.
Begin the process by inspecting your panel's load capacity and exploring models suited to your needs, such as those with flexible zones for diverse cookware. Consult local experts for a site visit, then proceed with gas disconnection. This upgrade transforms routine meal preparation into a more intuitive, secure experience, positioning your kitchen for sustained reliability and enjoyment.