Upgrade Your Kitchen to Induction Without a Full Rip-Out
Induction cooking represents a significant advancement in kitchen technology, offering precision, efficiency, and safety. Homeowners and renters alike can adopt this method without undertaking a complete renovation. This guide outlines practical strategies to integrate induction cooking into existing spaces, ensuring a seamless transition that enhances functionality while preserving the current layout.
Professionals in kitchen design and installation have successfully implemented these upgrades in diverse settings, from residential homes to studio environments. The key elements involve thorough assessment, strategic selection of equipment, and attention to installation details. Follow these steps to achieve a modern, efficient kitchen tailored to your needs and budget.
Debunking the Full Renovation Myth
A common misconception holds that transitioning to induction cooking requires dismantling cabinets, countertops, and electrical infrastructure. In reality, most installations leverage existing setups with minimal disruption. This approach treats the change as a targeted upgrade rather than a comprehensive overhaul, conserving both time and resources.
Evaluate your current kitchen configuration to identify compatible elements. Standard electric cooktops often share dimensions with induction models, allowing for straightforward replacements. By focusing on these compatibilities, you avoid extensive structural modifications.
Step 1: Assess Your Current Setup
Begin by examining your kitchen's electrical capacity and cooktop dimensions. Induction units typically require a dedicated 240-volt circuit, similar to many electric ranges. Consult a licensed electrician to verify if your wiring supports this load; upgrades, if needed, often involve simple panel adjustments rather than full rewiring.
Measure the existing cutout in your countertop precisely, noting width, depth, and depth from the surface. Document the countertop material, as this influences any minor adjustments. This initial evaluation ensures you select equipment that fits without alterations.
Step 2: Select the Appropriate Induction Solution
Induction options vary by scale and investment level, accommodating different living situations. Consider portability for temporary setups or integrated units for permanent installations. Each category provides reliable performance suited to specific needs.
Low-Budget Options (Under $300)
Portable induction burners offer an accessible entry point, ideal for apartments, rentals, or supplemental cooking. These single- or dual-burner units plug into standard 120-volt outlets and rest on countertops. Brands such as Duxtop and IKEA provide durable models with adjustable heat settings, allowing easy storage and mobility.
Mid-Range Options ($400 to $1,200)
For those with existing electric cooktops, drop-in induction models integrate seamlessly. Manufacturers like GE, Frigidaire, and Samsung produce units that match standard cutouts, requiring only the removal of the old appliance. This swap enhances efficiency without altering surrounding surfaces.
High-End Options ($1,500 and Above)
Full induction ranges combine cooktops and ovens in a single appliance, suitable for comprehensive upgrades. Options from Bosch, Miele, and Café fit standard range spaces, delivering advanced features like precise temperature control and integrated timers. These selections elevate both aesthetics and performance.
Step 3: Address Electrical Requirements
Induction cooking demands stable power delivery to operate effectively. Most households with electric stoves already possess compatible circuits, but confirmation is essential. Engage a qualified electrician to inspect and, if necessary, install a dedicated line, which typically takes a few hours.
For portable units, standard outlets suffice, eliminating the need for professional intervention. In cases of insufficient amperage, circuit breakers may require upgrading, but this remains far less invasive than a full electrical overhaul.
Step 4: Prepare the Countertop Surface
Ensure the countertop accommodates the new unit for a professional appearance. Standard sizes for induction cooktops align with many existing openings, minimizing the need for cuts. Use a template provided by the manufacturer to verify fit before proceeding.
If minor resizing proves necessary, a professional fabricator can adjust granite, quartz, laminate, or solid surface materials efficiently. For aging laminate counters, install a trim ring kit to conceal edges and enhance durability. These preparations maintain the countertop's integrity while achieving a flush installation.
Step 5: Ensure Proper Installation
Professional installation guarantees safety and longevity. For drop-in cooktops, secure the unit into the cutout using manufacturer-supplied brackets and seals. Full ranges slide into place after disconnecting the old appliance, with venting adjustments if applicable.
Portable models require no installation beyond placing them on a heat-resistant surface. Test all connections post-setup to confirm even heating and responsive controls. Adhering to these practices prevents common issues like uneven performance or safety hazards.
Step 6: Choose Compatible Cookware
Induction technology heats cookware directly through magnetic induction, necessitating ferromagnetic bases. Test existing pots and pans with a magnet; adherence indicates compatibility. This method allows retention of suitable items, reducing replacement costs.
Cookware Recommendations by Budget
- Low Budget ($60 to $100): Opt for induction-compatible sets from T-fal or Cuisinart, featuring enameled iron or basic stainless steel for versatile daily use.
- Mid-Range ($200 to $400): Select GreenPan or Calphalon collections with non-stick coatings and stainless bases, offering balanced heat distribution for frequent cooking.
- High-End ($500 and Above): Invest in All-Clad or Demeyere professional lines, crafted from multi-ply materials for superior conductivity and enduring quality.
For non-compatible favorites, an induction converter plate serves as an adapter, transferring heat to aluminum or copper bases. This accessory preserves cherished pieces while enabling induction benefits.
Enhance Functionality with Accessories
Complement your induction setup with practical add-ons that improve usability and protect surfaces. These items integrate effortlessly, maintaining a streamlined kitchen environment.
Recommended Accessories
- Magnetic trivet mats to safely transfer hot cookware and shield countertops.
- Silicone cooktop protectors that guard against scratches and simplify cleaning.
- Induction-specific griddles for expanded cooking options like grilling or sautéing.
- Low-profile ventilation hoods designed for overhead installation above cooktops.
Such enhancements optimize workflow and extend equipment lifespan.
Strategic Budget Allocation
Tailor your induction investment to financial constraints while maximizing value. Each tier delivers core advantages like rapid boiling and energy savings.
Under $200
Portable burners provide essential functionality for basic needs, ideal for compact or transient living spaces.
$400 to $800
Drop-in cooktops replace outdated electrics, preserving infrastructure investments.
$1,000 to $2,000
Full ranges offer integrated solutions with styling refinements for cohesive design.
$3,000 and Above
Custom installations incorporate flush mounts and downdraft systems for premium, seamless results.
Daily Benefits and Maintenance
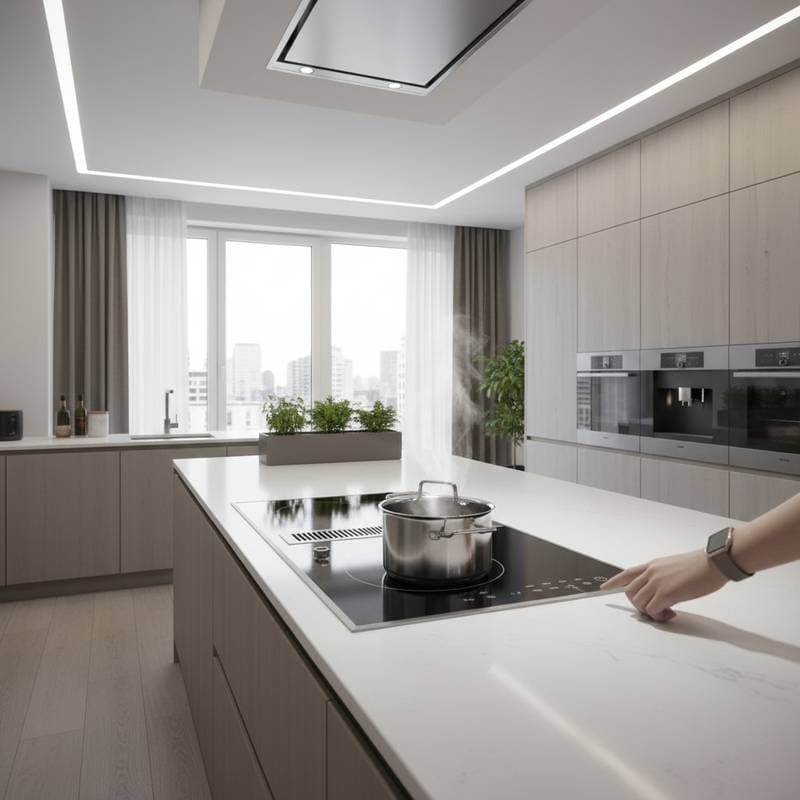
An induction-equipped kitchen operates with notable efficiency, heating cookware swiftly while keeping surfaces cool to the touch. Energy consumption decreases, and cleanup simplifies due to contained spills. Users experience reduced ambient heat, enhancing comfort during meal preparation.
Maintain the system by wiping the cooktop promptly after use with a soft cloth and non-abrasive cleaner. Avoid harsh scrubbers to preserve the glass-ceramic surface. With proper care, induction appliances endure for decades, justifying the initial outlay.
Induction cooking adapts to various design aesthetics, from traditional to minimalist, serving as a versatile centerpiece. This upgrade not only streamlines routines but also future-proofs your space against evolving culinary demands.
Implement Your Induction Upgrade
Proceed with confidence by starting with an assessment and selecting aligned components. This methodical approach yields a kitchen that performs exceptionally without unnecessary upheaval. Enjoy the precision and modernity that induction brings to your home.


